
Customers can pay you in Dip once you connect your bank account. See Connect your bank account to get paid in Dip.
Create a work order
A work order is a repair or any other job outside regular service.
Choose the customer
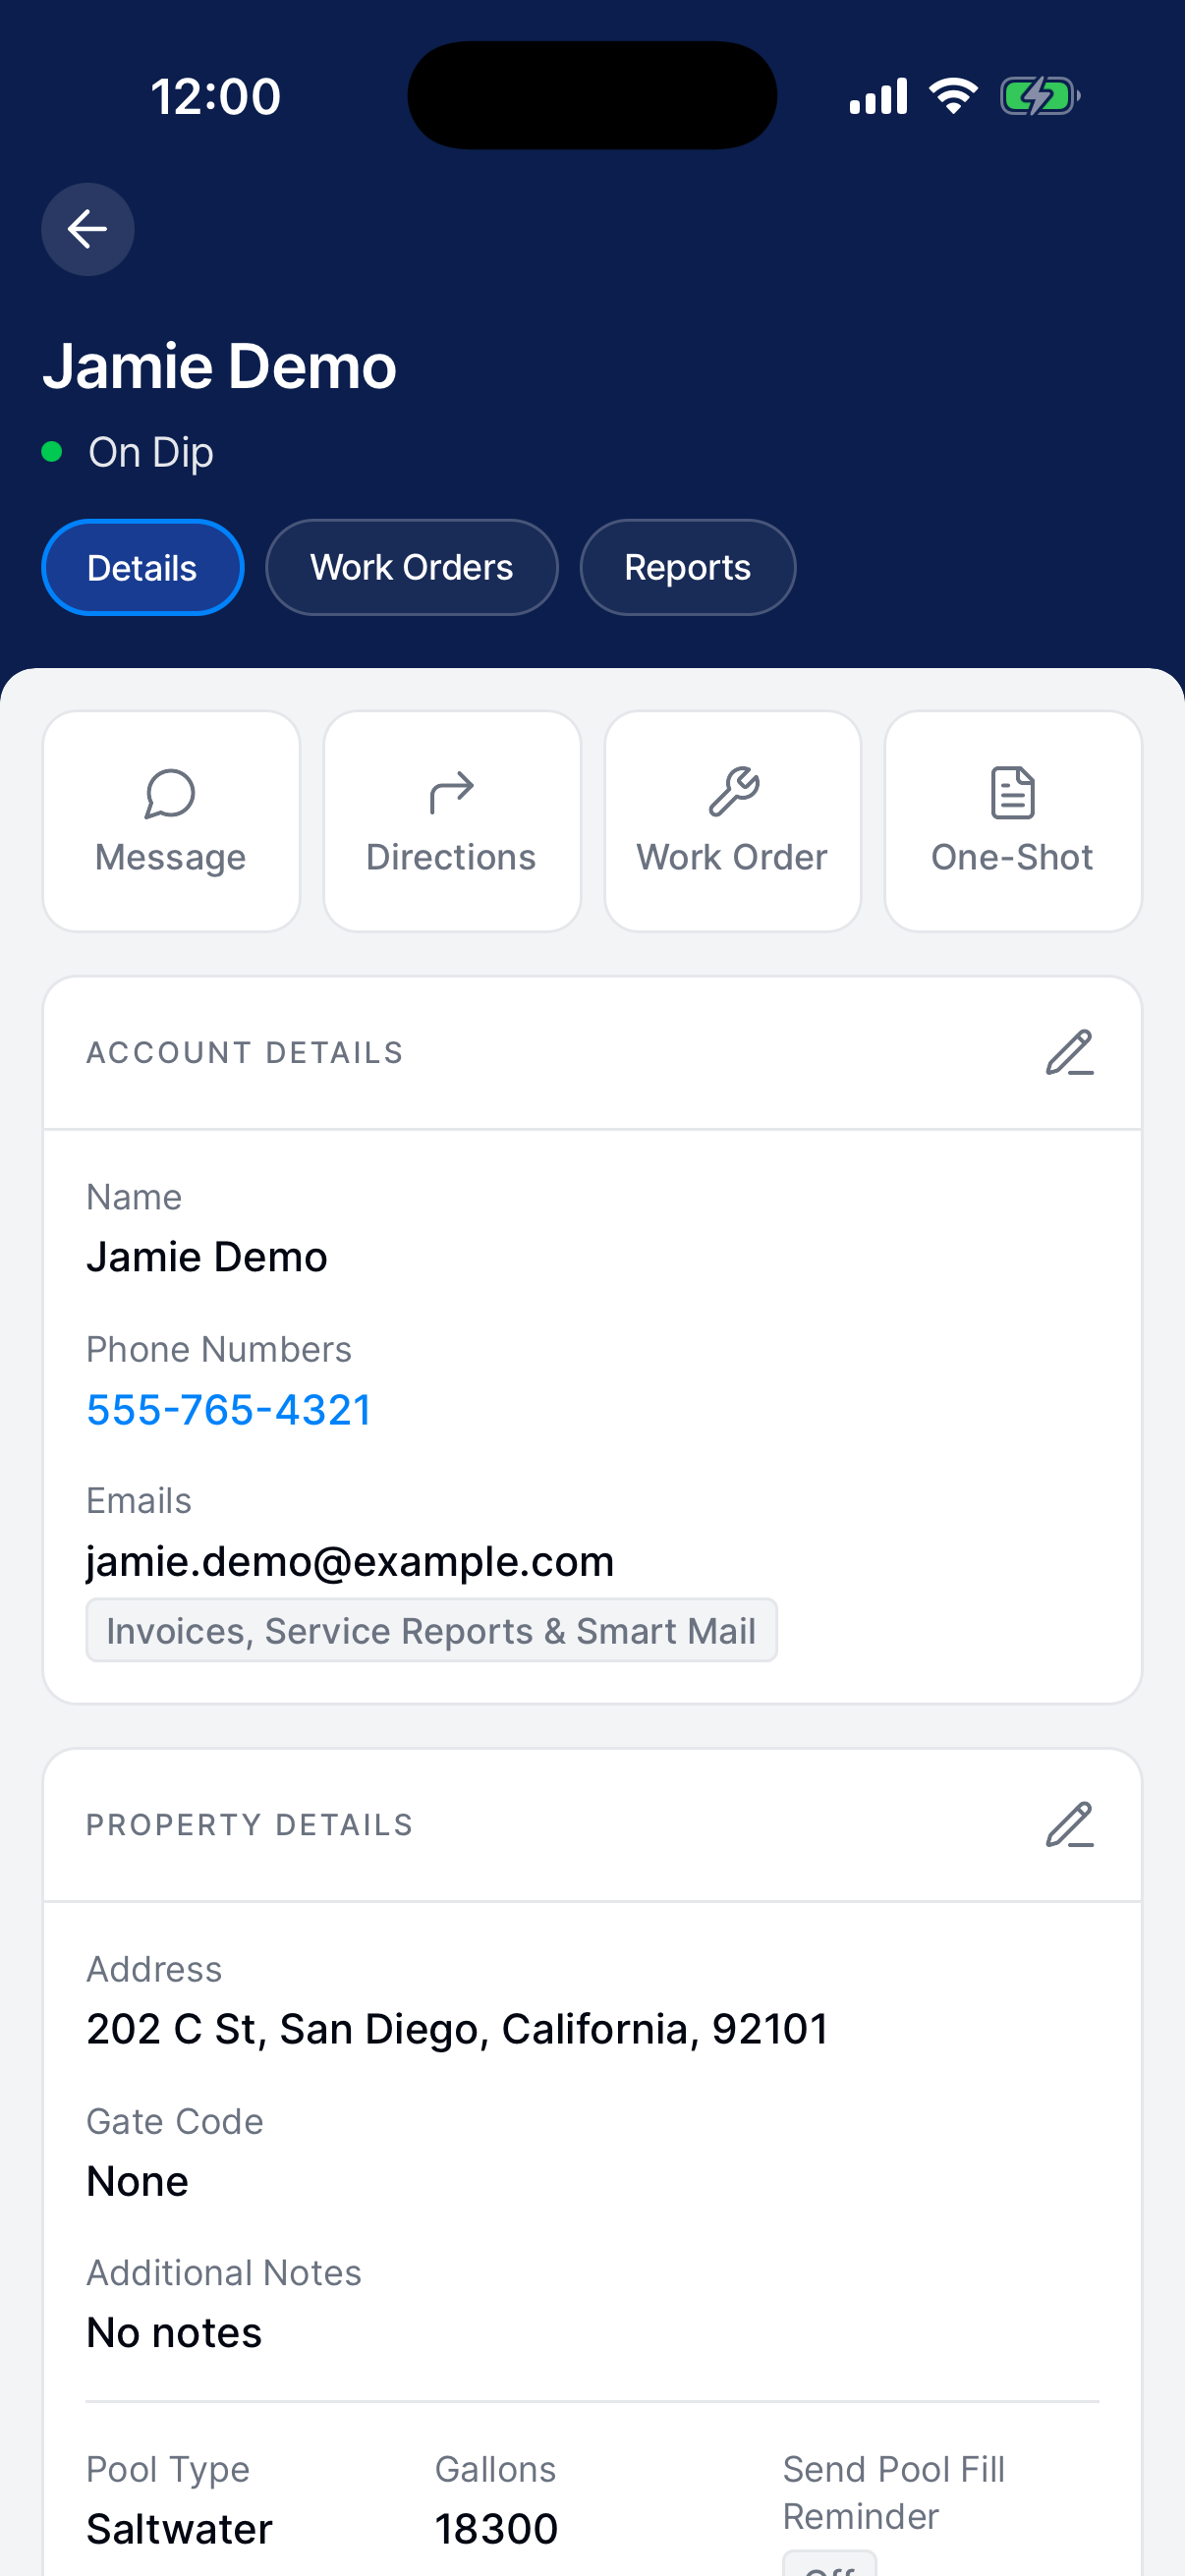
Open Customers and tap the customer. On Details, tap Work Order.
Describe the work
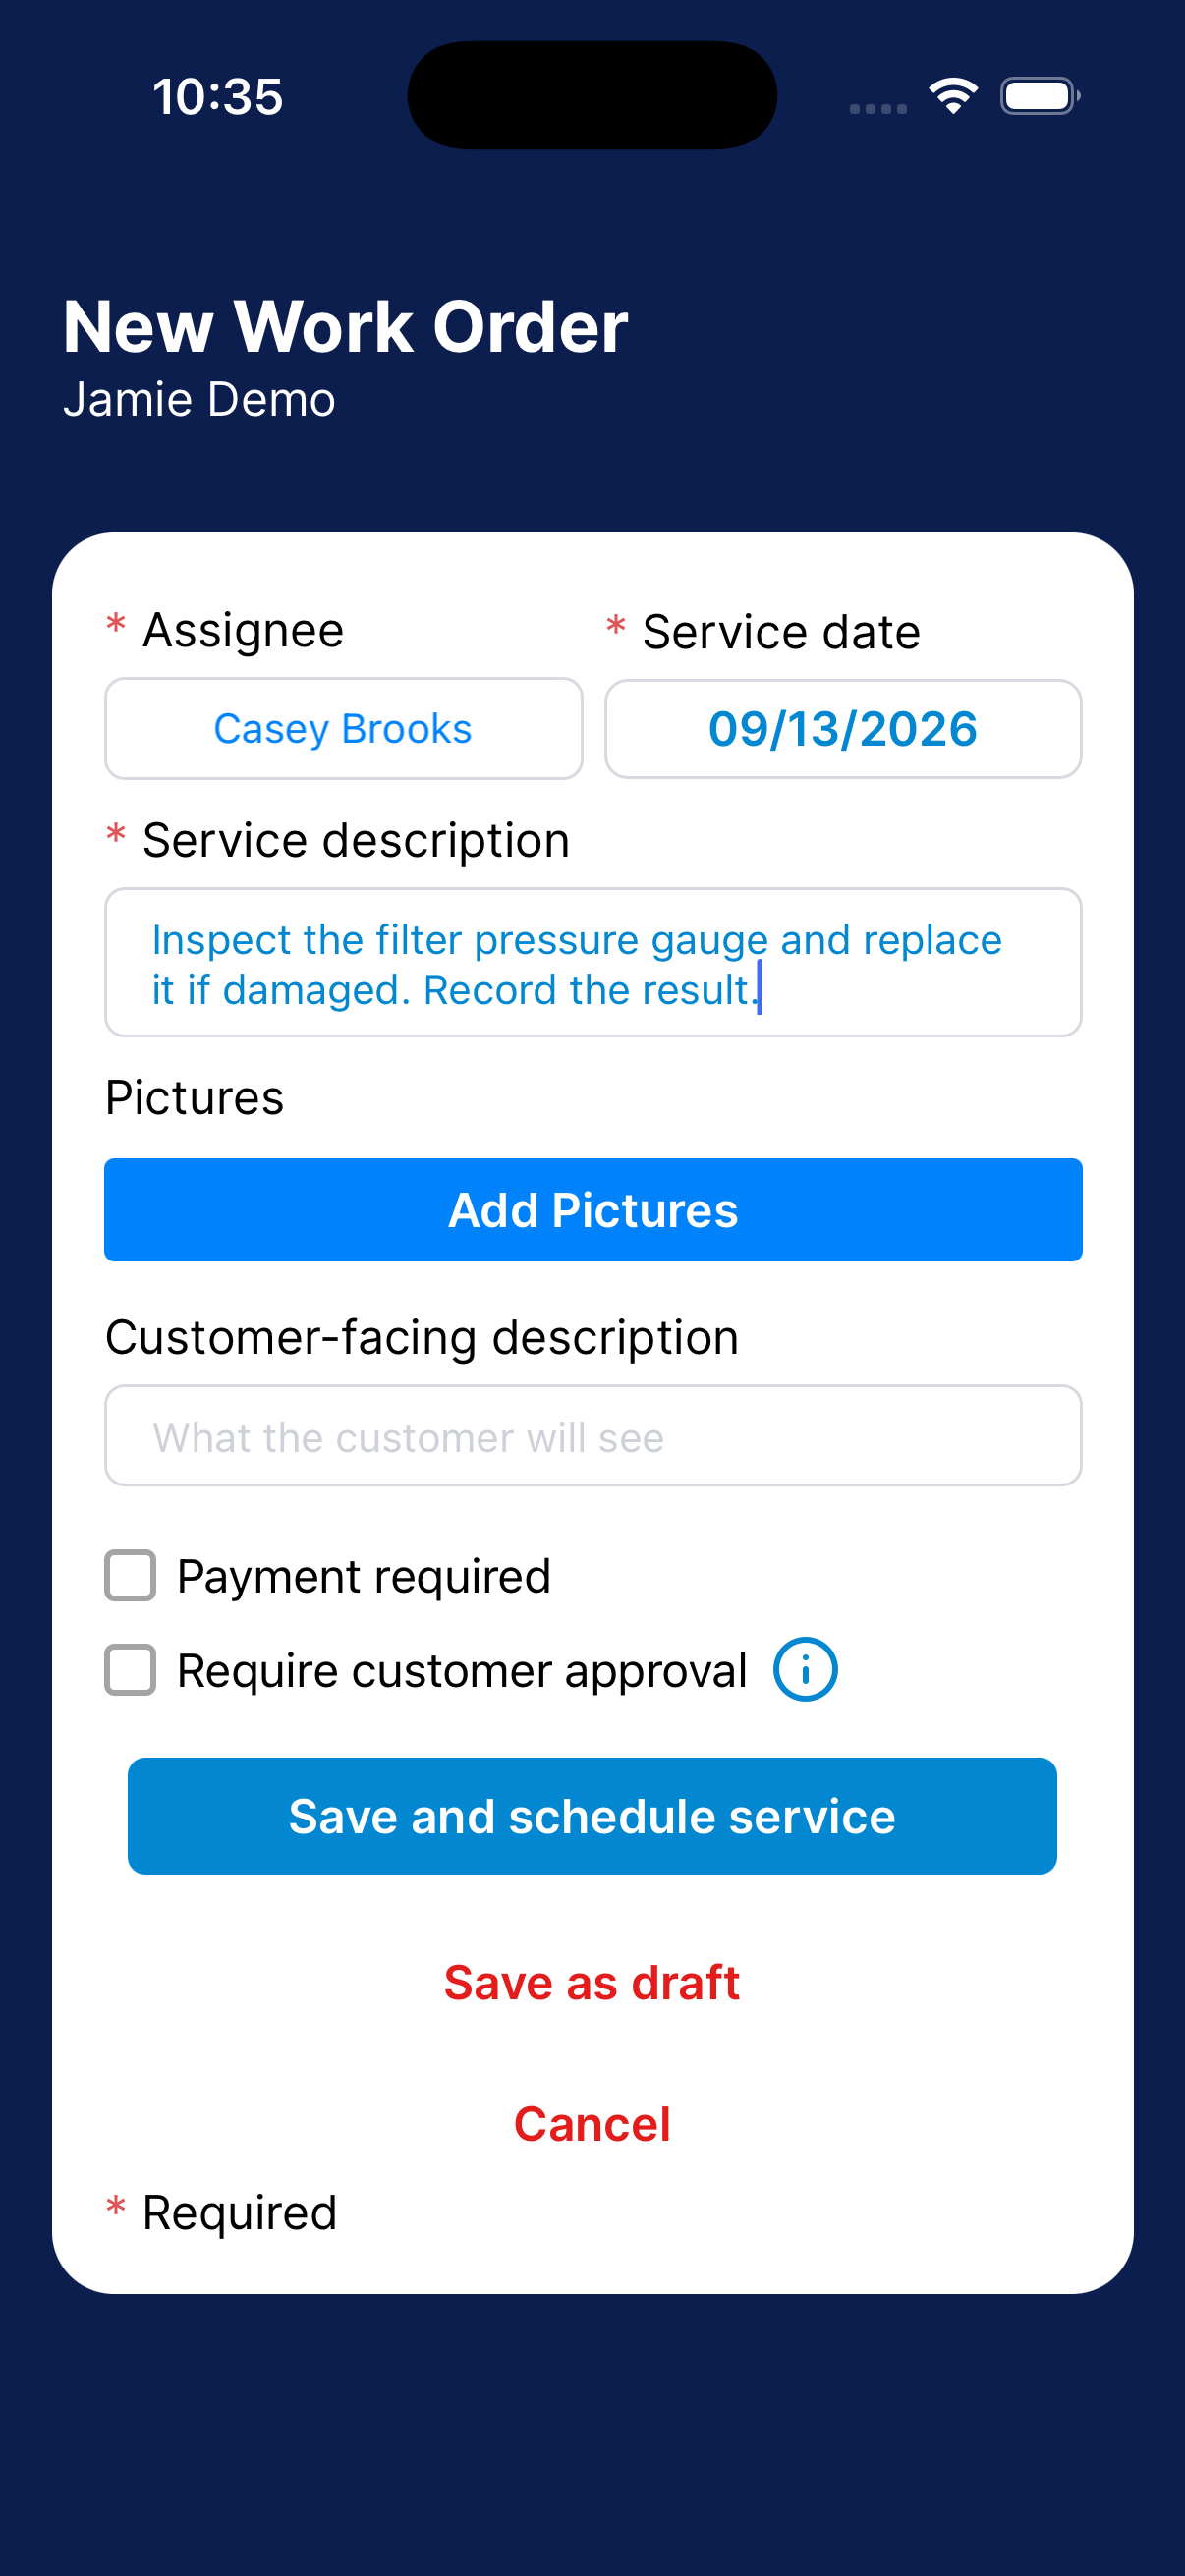
Choose the Assignee and Service date. Enter the Service description for the team.
Add pictures if they help.
Add the customer’s description
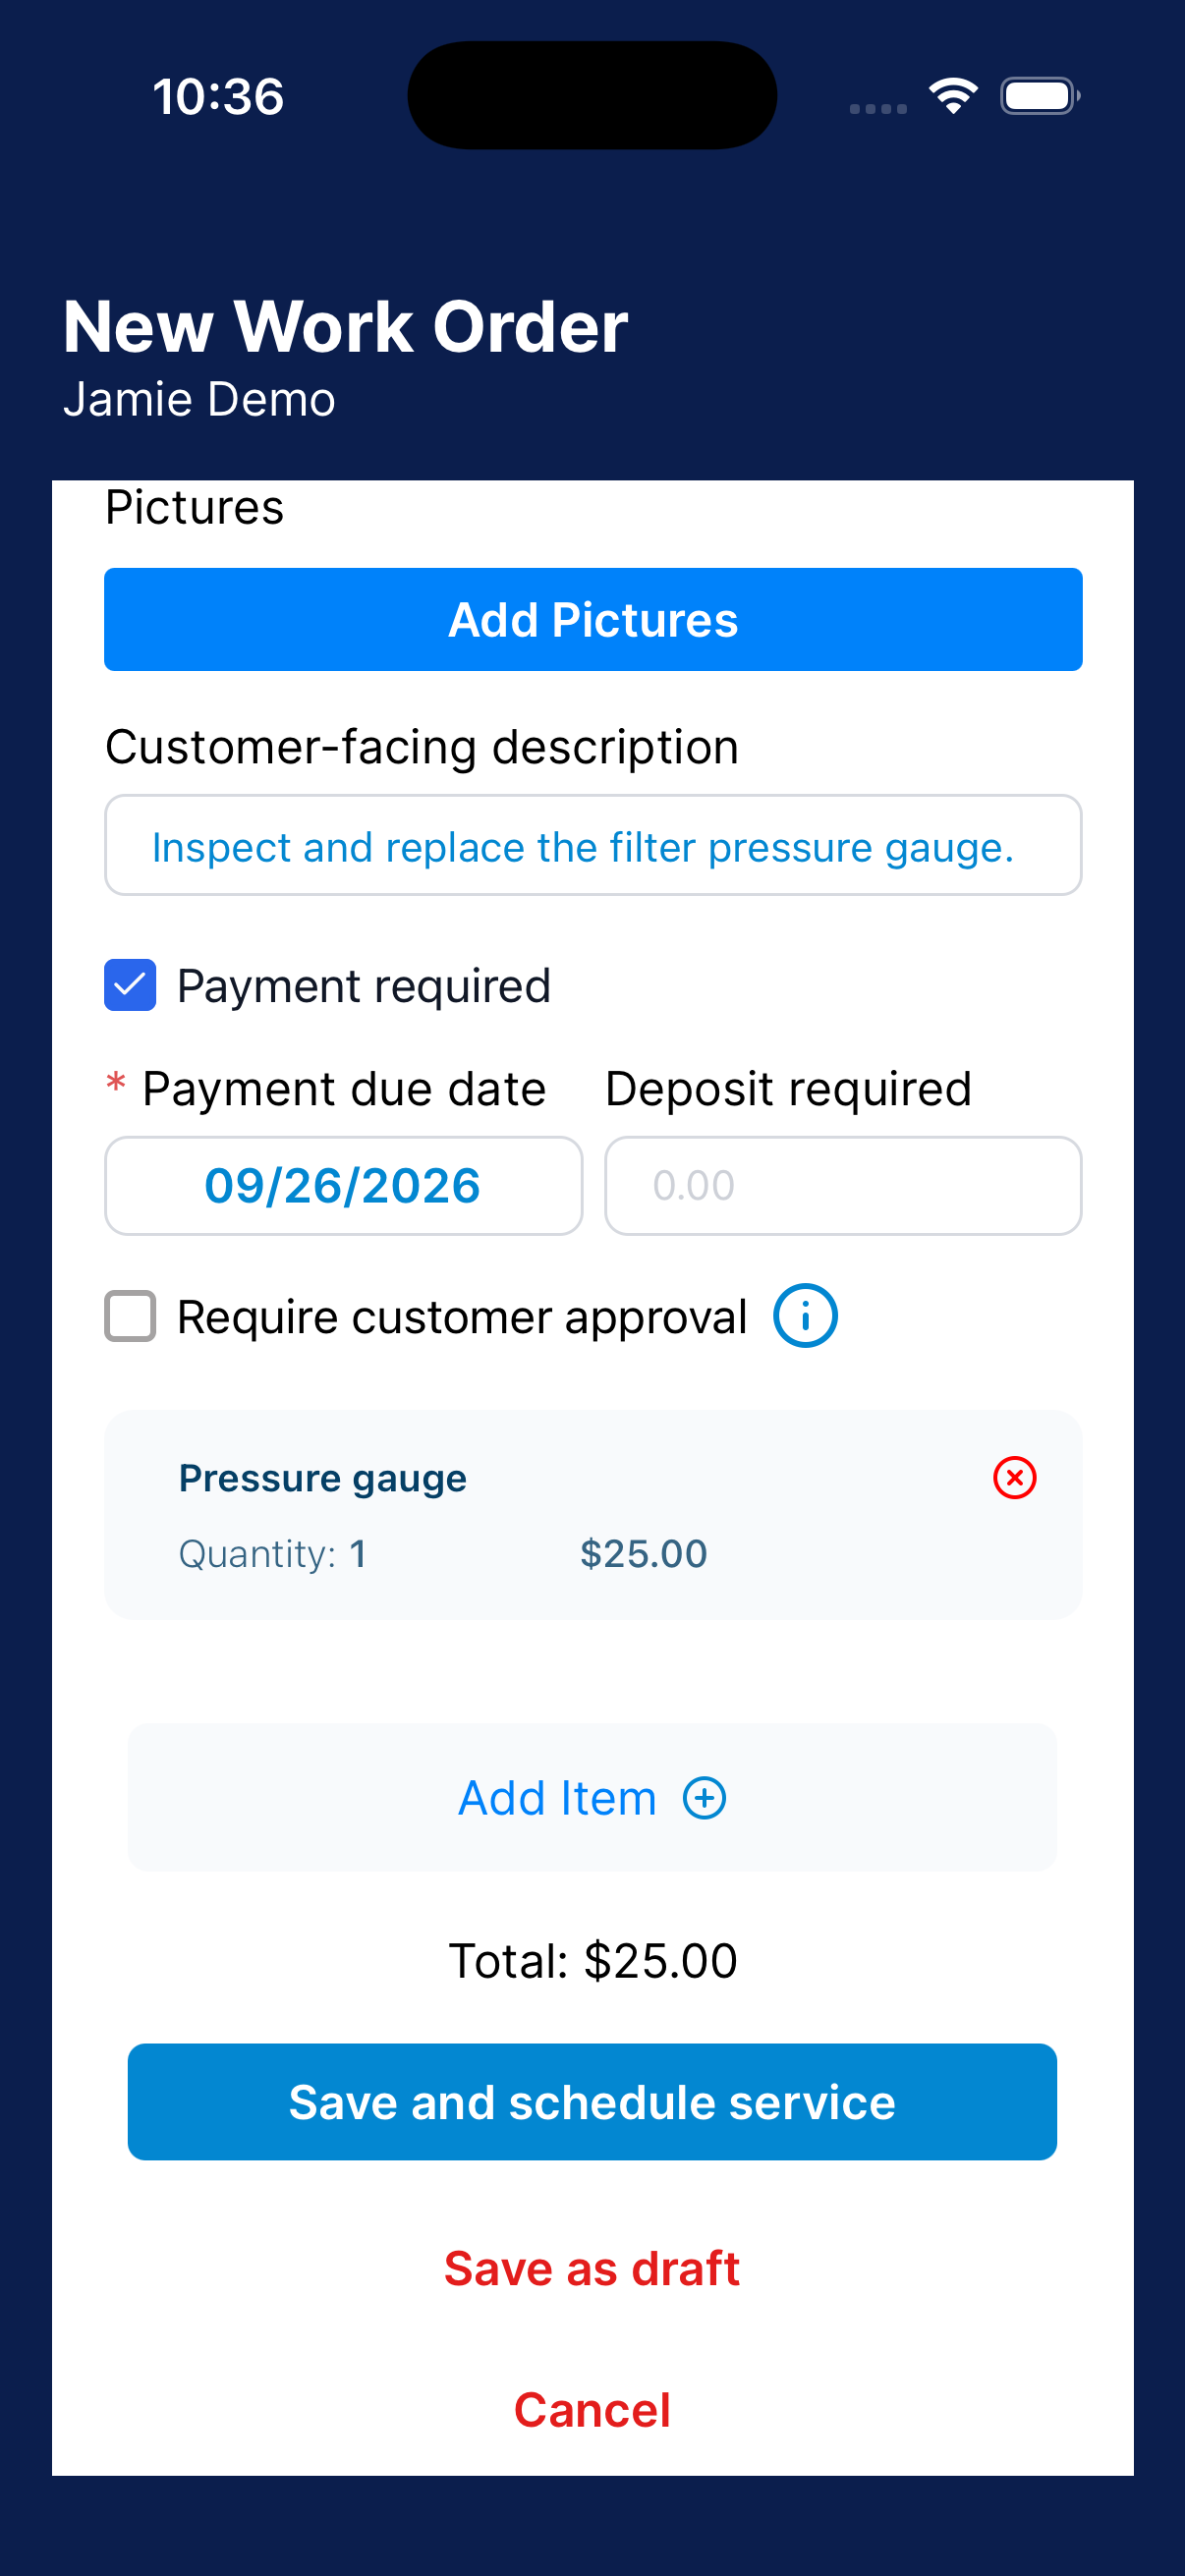
Write what the customer will read in Customer-facing description. The Service description above is for your team.
Set payment and approval
Turn on Payment required if you’re charging for the job. Tap Add Item for each charge. An item can have a description if the customer needs details.
The Payment due date starts from your payment term. Tap it to pick another day. Enter a deposit under Deposit required if you want one.
Turn on Require customer approval if the customer must approve before the job is scheduled. A deposit turns it on for you.
The term is the Due row under Automatic Monthly Invoices in Business → Settings. On the web at dashboard.thedip.app, it’s the same row in Business settings.
Schedule, send, or save a draft
Tap Save and schedule service. If you turned on approval, the button says Save and send to customer instead.
To finish later, tap Save as draft.
Finish a saved work order
A draft isn’t on the schedule yet, and the customer hasn’t seen it.
Show drafts
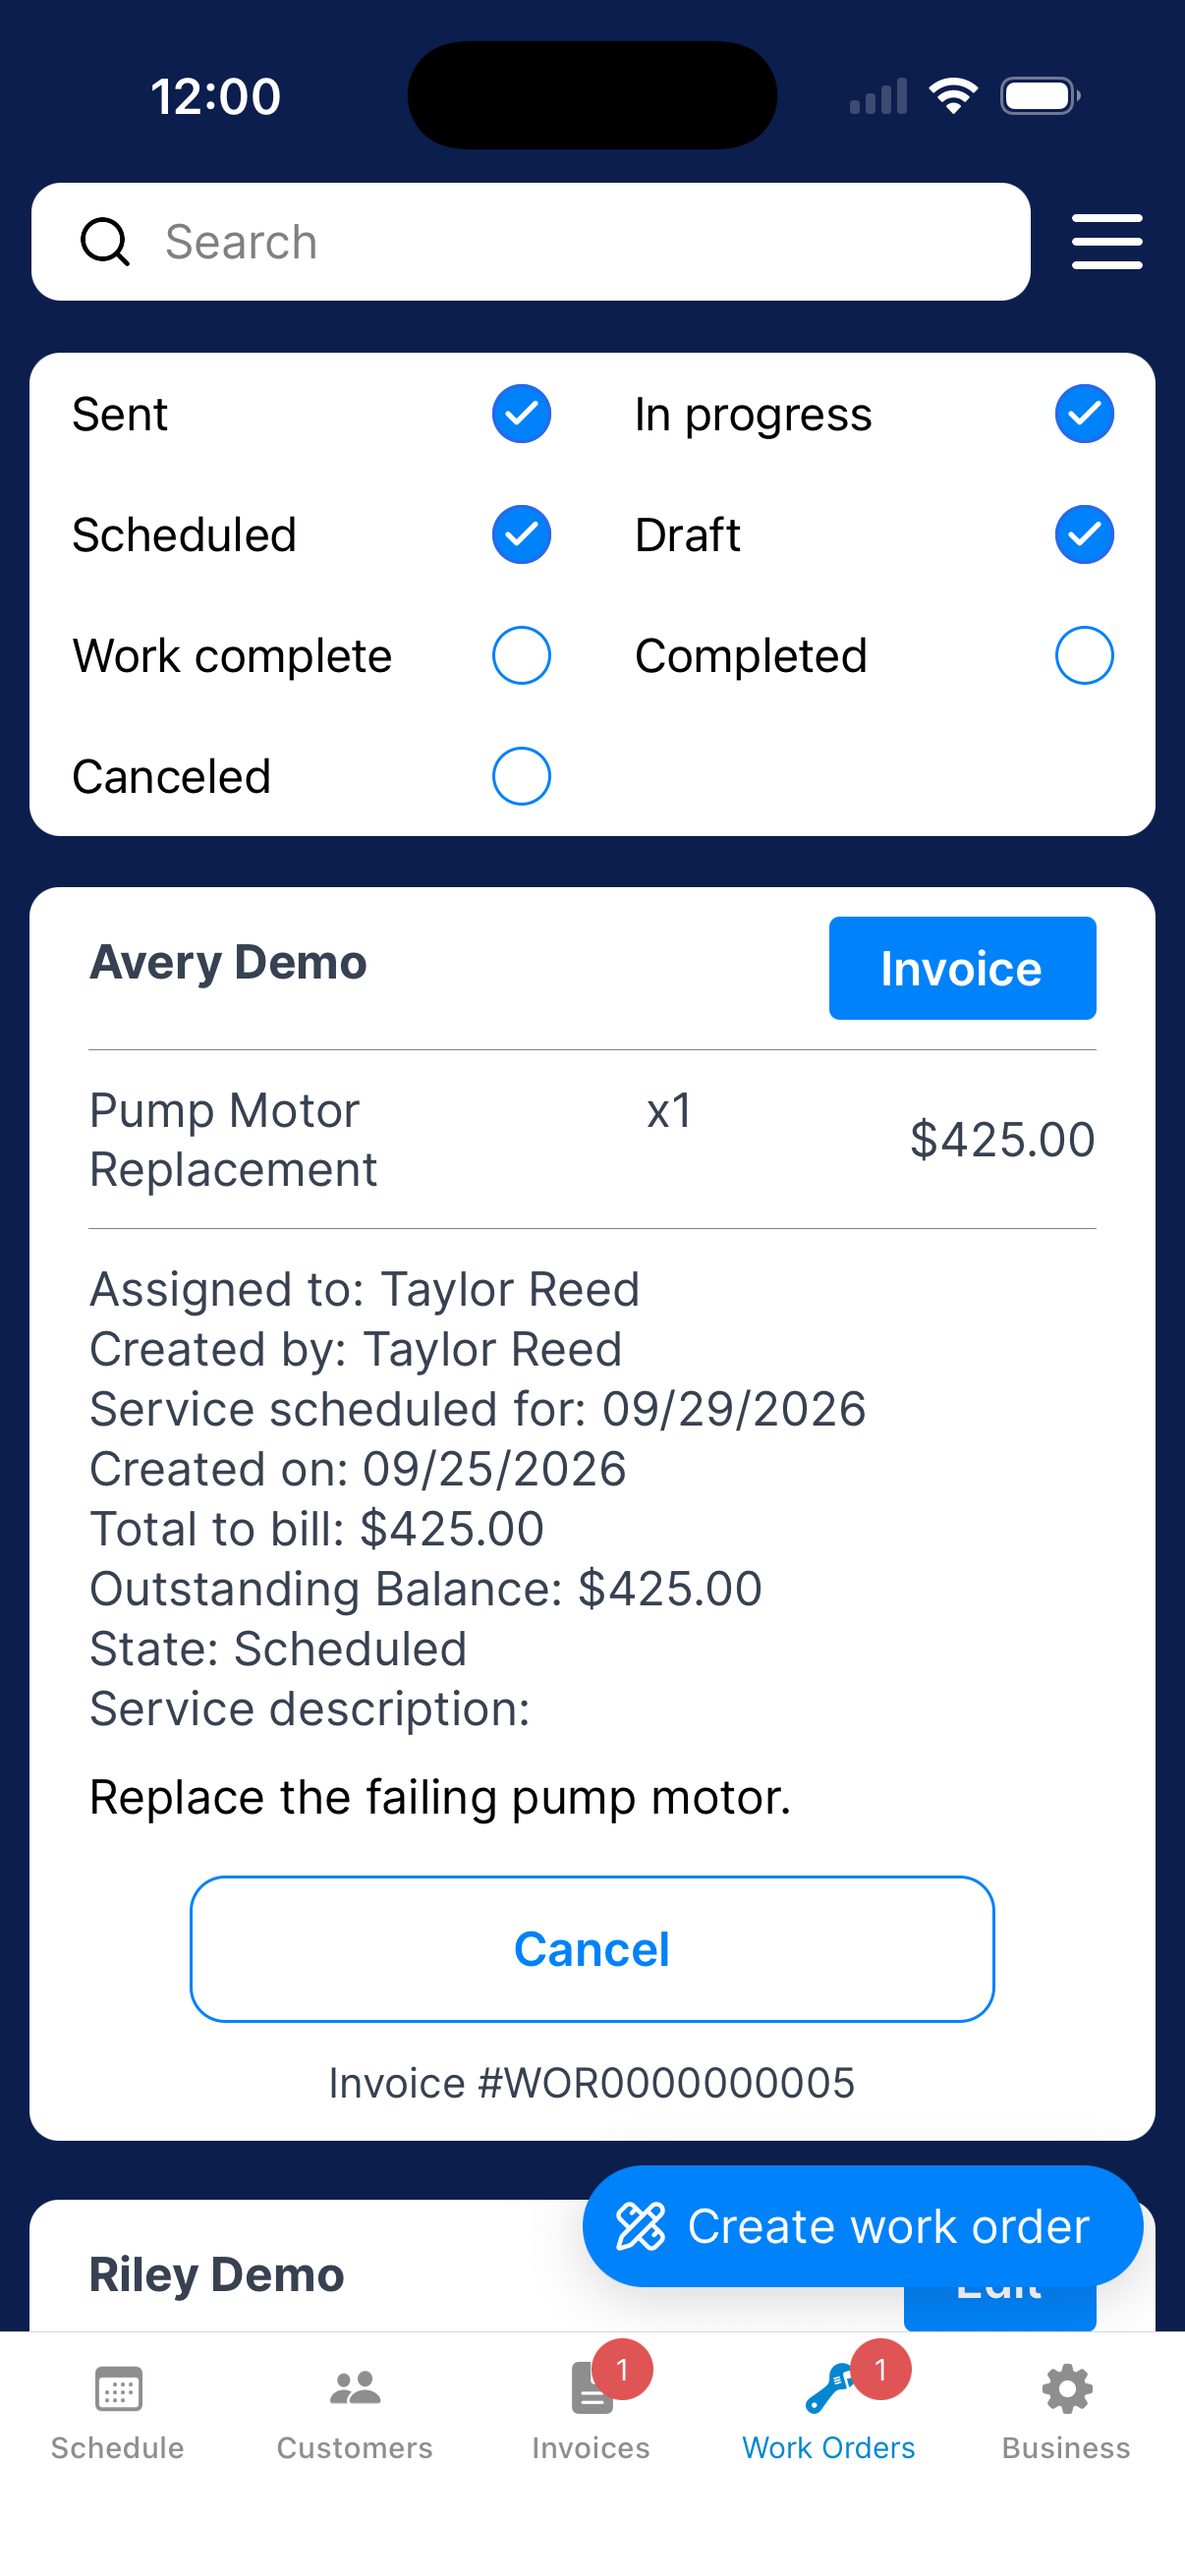
Open Work Orders and use the filters to show Draft.
Review the work order
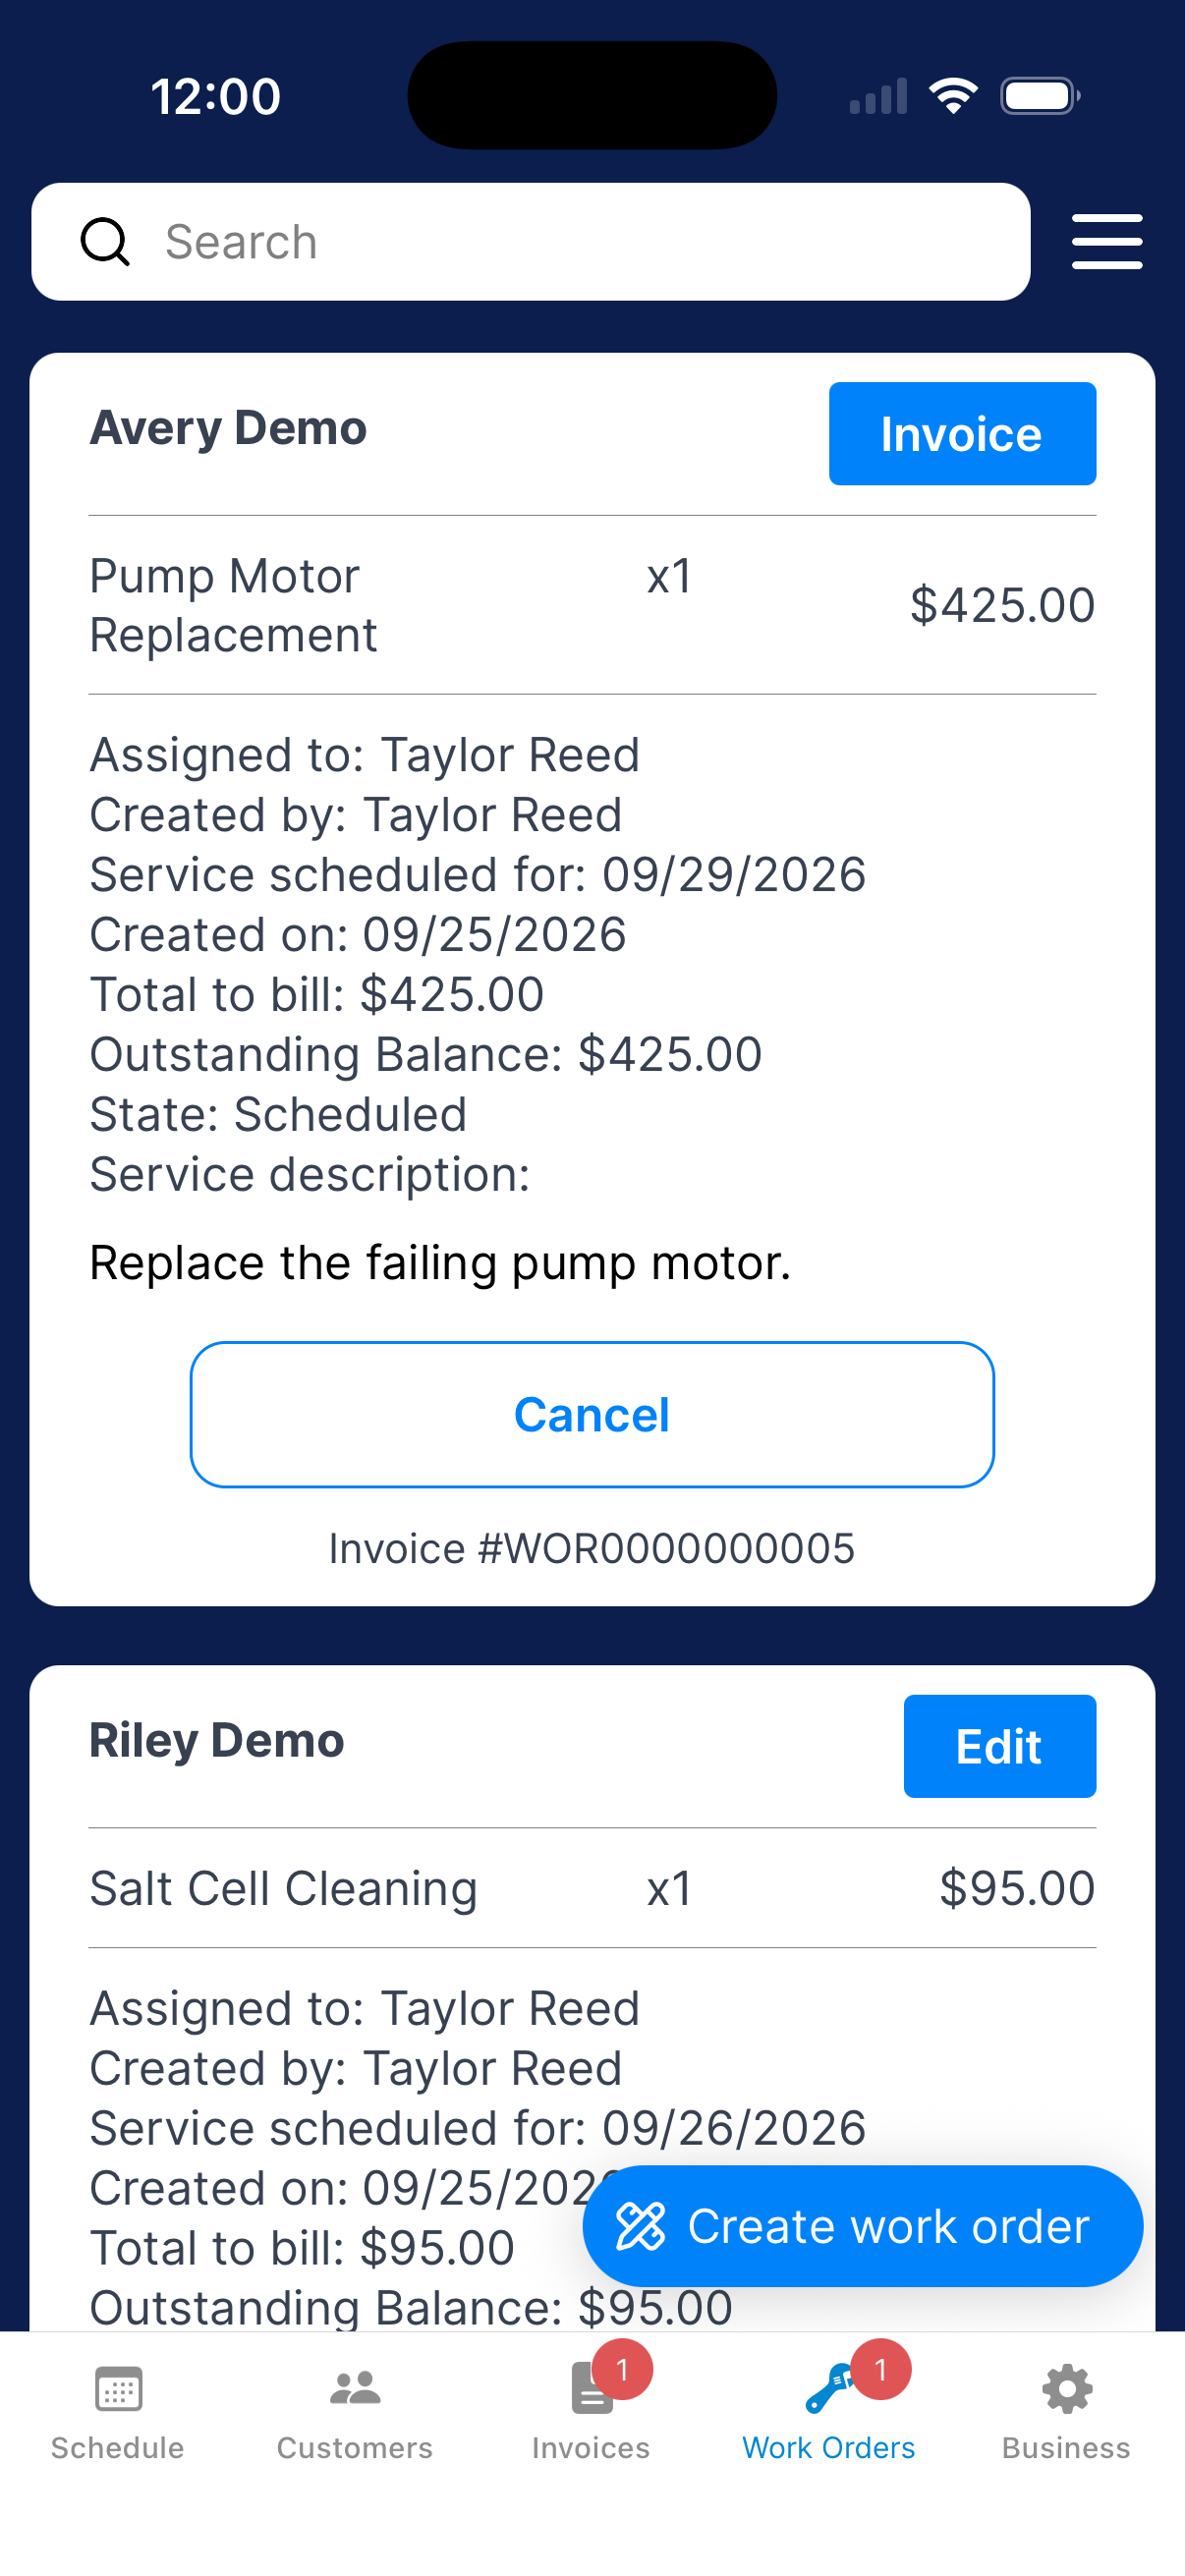
Find the customer’s card and see what’s still missing.
Edit what’s missing
Tap Edit on the card, fill in what’s missing, and tap Update draft.
Send or schedule
Tap Send to customer, or Schedule service if the job doesn’t need approval.
Change the technician
Open the service day
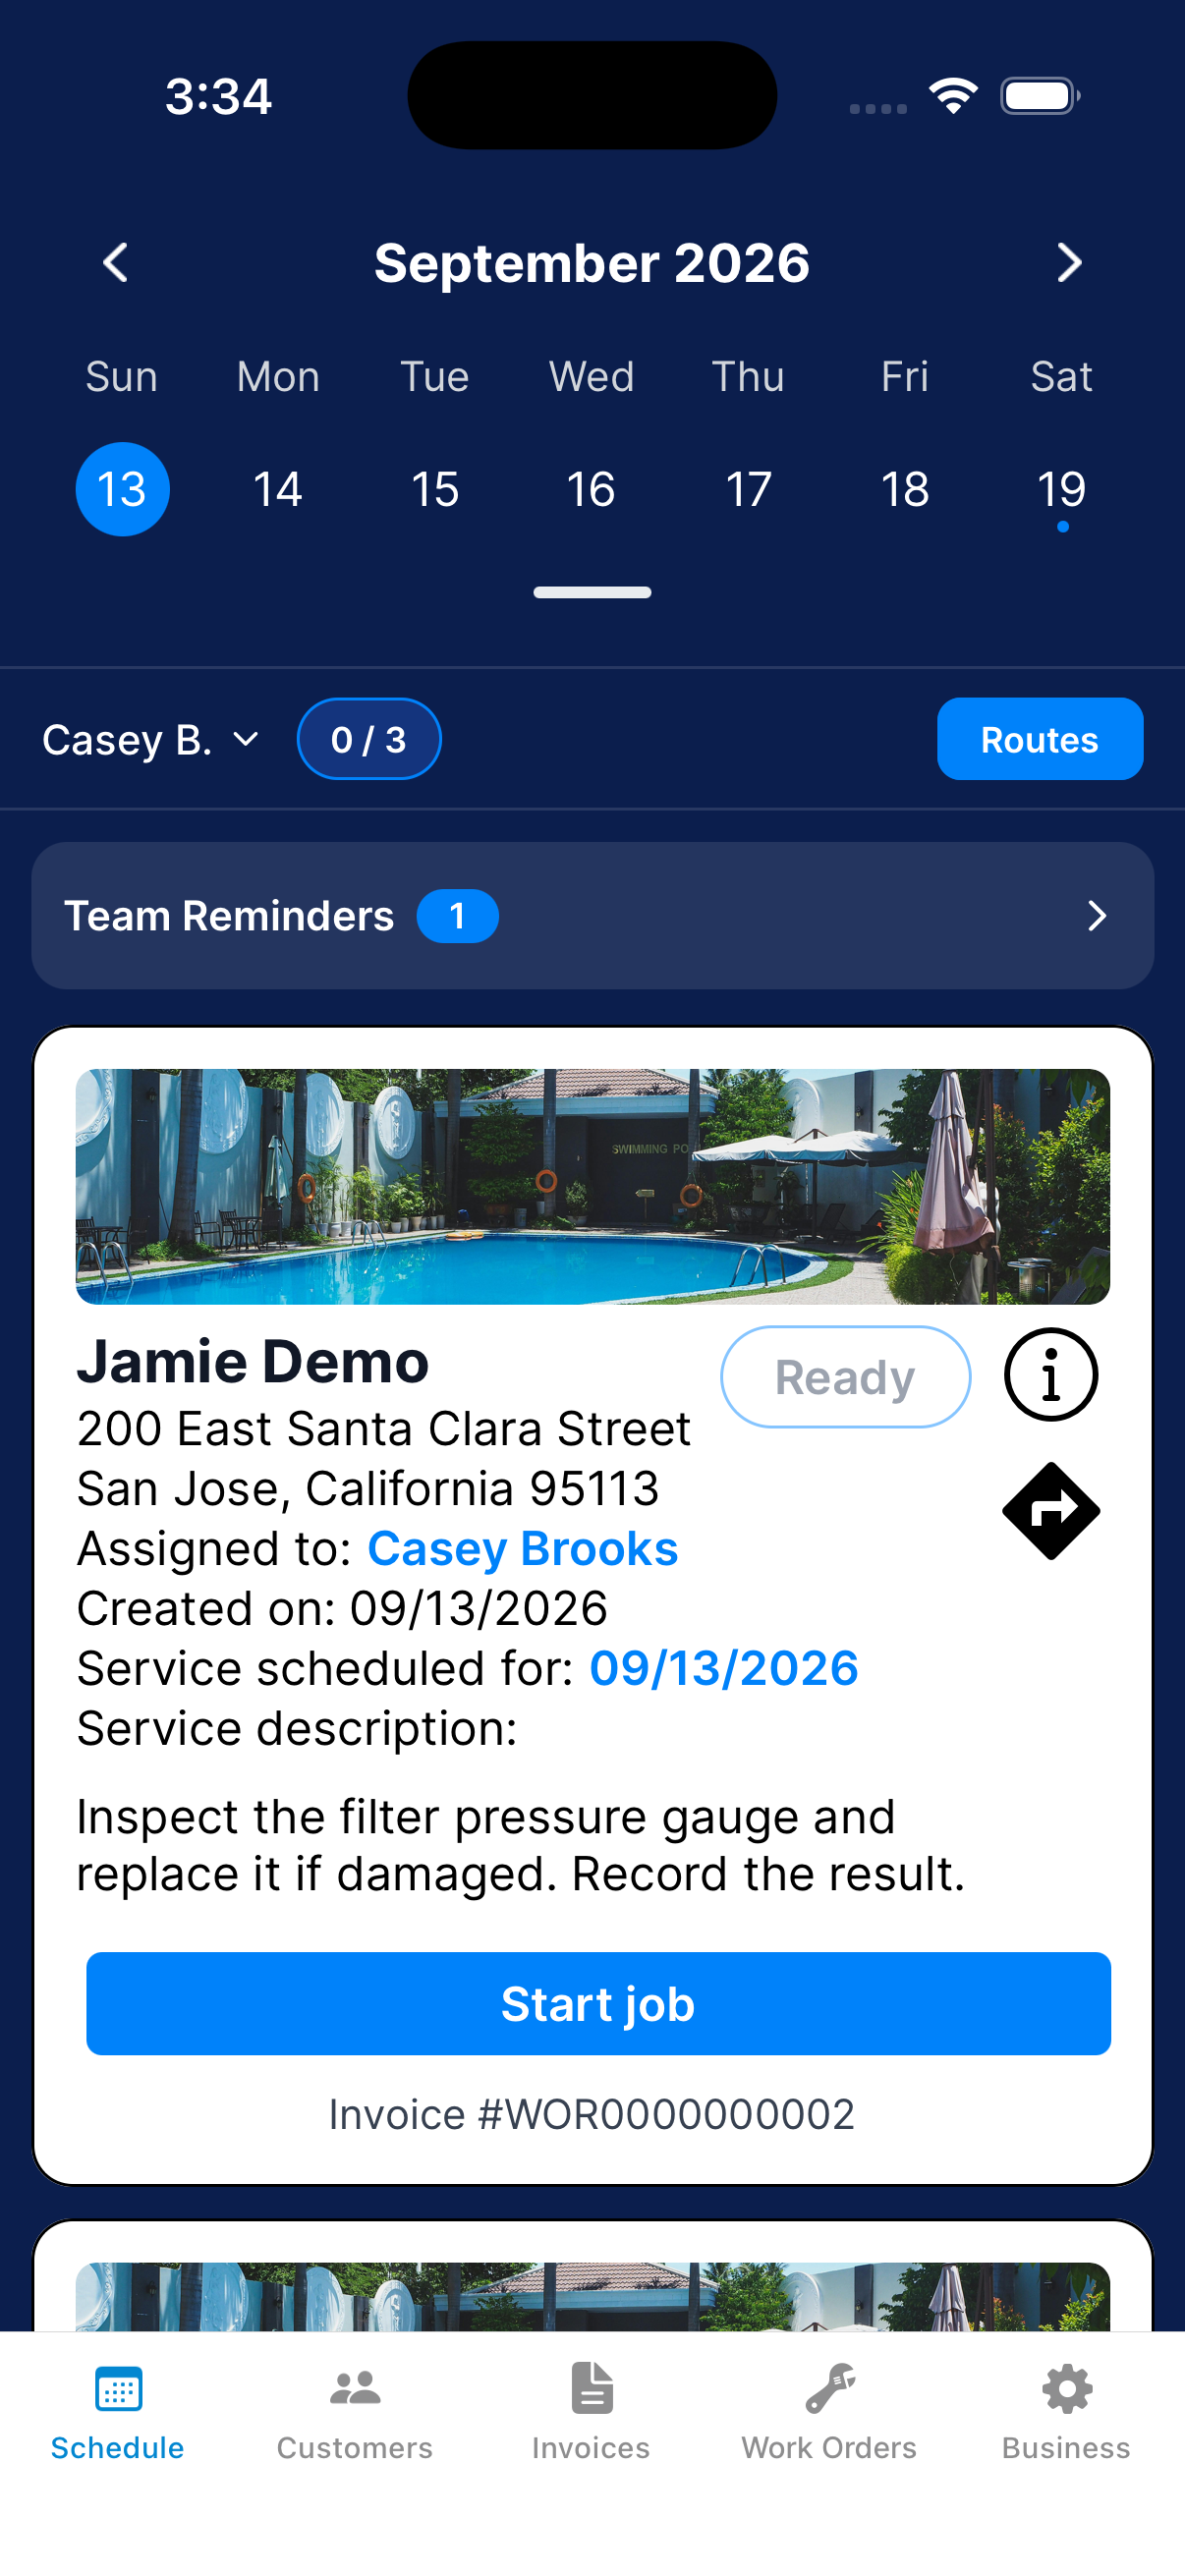
Go to Schedule and choose the work order’s scheduled date.
Find the work order
On the work-order card, tap the blue name next to Assigned to:. It says Choose tech if nobody is assigned yet.
Choose the technician
Choose the technician. Their name replaces the old one on the card.
Check status or cancel a job
Choose the statuses
Open the filter menu. Select the statuses you want, such as Draft, Sent, Scheduled, In progress, Work complete, Completed, or Canceled.
Review a work order
Find the customer’s work-order card. Tap Invoice to open the job’s invoice, or View Report to see the finished report.
Cancel a work order
Tap Cancel on the work order, then OK. The customer can’t pay it while it’s canceled. If they were sent it, Dip tells them it was canceled. A draft cancels without telling anyone.
To back out, tap Keep it.
Restore a canceled work order
Include Canceled in the filters. Tap Restore on the work order and tap OK. If the customer was sent it, Dip tells them it’s back.
What happens next?
Scheduled work shows on Schedule on its service date.
Need a hand?
The customer approved by phone. Can I approve it for them?
Yes. Tap Invoice on the work order and tap Approve for Customer. See Approve an estimate for your customer.
Can I change the price after I send the work order?
Yes. Tap Invoice on the work order, then Edit Invoice. Change the items, due date, or deposit and tap Save changes. The total can’t go below what the customer has already paid.